Separating apples from oranges

Dick Hardt of Sxip posted a reply to my recent comments on the fears I have about attacks on OpenID:

My good friend Kim Cameron posted the following misinformation on OpenID:

InfoCards change the current model in which the user can be controlled by an evil site. OpenID doesn’t. 

If a user ends up at an evil site today, it can pose as a good site known to the user by scooping the good site’s skin so the user is fooled into entering her username and password.

An evil site proxying a web based OpenID Provider is a known security threat in OpenID. There are a number of ways of thwarting this attack, and given that the user has a close relationship with their OP, not difficult to deploy. Similar to the advantages that CardSpace has with a client side implementation, Sxipper is a Firefox plug-in that provides an OpenID user with the same client side protections as CardSpace. OpenID is a protocol, similar at a high level to WS-* — so this is somewhat of an apples an oranges comparison. CardSpace could support OpenID and protect the user.

I’d like to see OpenID and InfoCard technologies come together more. I’ll be presenting a plan for that over the next little while.

I’m looking forward to seeing your thoughts Kim! Perhaps supporting OpenID in Cardspace?

I'm not just talking about (realtime) proxying.  I'm talking about social engineering attacks in general.  Where is the misinformation in my description of these attacks?  

Dick reassures us that use of the protocol to help convince uers to reveal their credential is a known attack.  Should this make me feel better?  I don't think so. 

I also don't think the mitigations I've heard about are too convincing – with a couple of exceptions. 

One of those is the mitigation devised by Dick himself – called Sxipper.  This is a plugin for the browser which, as I understand it, take control away from the evil party.  If all OpenID implementations were to add this feature it would be a big step forward!

But in that case, if we want to separate apples from oranges, let's not say that InfoCards require a client component and OpenID doesn't.  Let's say that to offer reasonable protection, InfoCards require a client component and so does OpenID.  That would, as Dick proposes, properly separate discussion of protocols from the overall delivery of an identity solution.

Use of a hardware token at the OpenID site also mitigates the social engineering attack, though not the man in the middle attack.

More later about how Cardspace and OpenID can converge further.

As simple as possible – but no simpler

Gunnar Peterson recently showed me a posting by Andy Jaquith (securitymetrics.org and JSPWiki) that combines coding, wiki, identity, Cardspace, cybervandals, and OpenID all into one post – a pretty interesting set of memes.  Like me, he finally actually shut off anonymous commentary because he couldn't stand the spam workload, and is looking for answers:

Last week's shutoff of this website's self-registration system was something I did with deep misgivings. I've always been a fan of keeping the Web as open as possible. I cannot stand soul-sucking, personally invasive registration processes like the New York Times website. However, my experience with a particularly persistent Italian vandal was instructive, and it got me thinking about the relationship between accountability and identity.

Some background. When you self-register on securitymetrics.org you supply a desired “wiki name”, a full name, a desired login id, and optionally a e-mail address for password resets. We require the identifying information to associate specific activities (page edits, attachment uploads, login/log out events) with particular members. We do not verify the information, and we trust that the user is telling truth. Our Italian vandal decided to abuse our trust in him by attaching pr0n links to the front page. Cute.

The software we use here on securitymetrics.org has decent audit logs. It was a simple matter of identifying the offending user account. I know which user put the porn spam on the website, and I know when he did it. I also know when he logged in, what IP address he came from, and what he claimed his “real” name was. But although I've got a decent amount of forensic information available to me, what I don't have any idea of whether the person who did it supplied real information when he registered.

And therein lies the paradox. I don't want to keep personal information about members — but at the same time, I want to have some degree of assurance that people who choose to become members are real people who have serious intent. But there's no way to get any level of assurance about intent. After alll, as the New Yorker cartoon aptly put it, on the Internet no-one knows if you're a dog. Or just a jackass.

During the holiday break, I did a bit of thinking and exploration about how to address (note I do not say “solve”) issues of identity and accountability, in the context of website registration. Because I am a co-author of the software we use to run this website (JSPWiki), I have a fair amount of freedom in coming up with possible enhancements.

One obvious way to address self-registration identity issue is to introduce a vetting system into the registration process. That is, when someone registers, it triggers a little workflow that requires me to do some investigation on the person. I already do this for the mailing list, so it would be a logical extension to do it for the wiki, too. This would solve the identity issue — successfully vetting someone would enable the administrator to have much higher confidence in their identity claims, albeit with some sacrifice

There's just one problem with this — I hate vetting people. It takes time to do, and I am always far, far behind.

A second approach is to not do anything special for registration, but moderate page changes. This, too, requires workflow. On the JSPWiki developer mailing lists, we've been discussing this option quite a bit, in combination with blacklists and anti-spam heuristics. This would help solve the accountability problem.

A third approach would be to accept third-party identities that you have a reasonable level of assurance in. Classic PKI (digital certificates) are a good example of third-party identities that you can inspect and choose to trust or not. But client-side digital certificates have deployment shortcomings. Very few people use them.

A promising alternative to client-side certificates is the new breed of digital identity architectures, many of which do not require a huge, monolithic corporate infrastructure to issue. I'm thinking mostly of OpenID and Microsoft's CardSpace specs. I really like what Kim Cameron has done with CardSpace; it takes a lot of the things that I like about Apple's Keychain (self-management, portability, simple user metaphors, ease-of-use) and applies it specifically to the issue of identity. CardSpace‘s InfoCards (I have always felt they should be called IdentityCards) are kind of like credit cards in your wallet. When you want to express a claim about your identity, you pick a card (any card!) and present it to the person who's asking.

What's nice about InfoCards is that, in theory, these are things you can create for yourself at a registrar (identity provider) of your choice. InfoCards also have good privacy controls — if you don't want a relying party (e.g., securitymetrics.org) to see your e-mail identity attribute, you don't have to release that information.

So, InfoCards have promise. But they use the WS-* XML standards for communication (think: big, hairy, complicated), and they require a client-side supplicant that allows users to navigate their InfoCards and present them when asked. It's nice to see that there's a Firefox InfoCard client, but there isn't one for Safari, and older versions of Windows are still left out in the cold. CardSpace will make its mark in time, but it is still early, methinks.

OpenID holds more promise for me. There are loads more implementations available (and several choices for Java libraries), and the mechanism that identity providers use to communicate with relying parties is simple and comprehensible by humans. It doesn't require special software because it relies on HTTP redirects to work. And best of all, the thing the identity is based on is something “my kind of people” all have: a website URL. Identity, essentially, boils down to an assertion of ownership over a URL. I like this because it's something I can verify easily. And by visiting your website, I can usually tell whether the person who owns that URL is my kind of people.

OpenID is cool. I got far enough into the evaluation process to do some reasonably serious interoperability testing with the SXIP and JanRain libraries. I mocked up a web server and got it to sucessfully accept identities from the Technorati and VeriSign OpenID services. But I hit a few snags.

Recall that the point of all of this fooling around is to figure out a way to balance privacy and authenticity. By “privacy”, I mean that I do not want to ask users to disgorge too much personal information to me when they register. And correspondingly, I do not want the custodial obligation of having to store and safeguard any information they give me. The ideal implementation, therefore, would accept an OpenID identity when presented, dyamically collect the attributes we want (really, just the full name and websute URL) and pull them into our in-memory session, and flush them at the end of the session. In other words, the integrity of the attributes presented, combined with transience yields privacy. It's kind of like the front-desk guard I used to see when I consulted to the Massachussetts Department of Mental Health. He was a rehabilitated patient, but his years of illness and heavy treatment left him with no memory for faces at all. Despite the fact I'd visited DMH on dozens of occasions, every time I signed in he would ask “Have you been here before? Do you know where you are going?” Put another way, integrity of identity + dynamic attribute exchange protocols + enforced amnesia = privacy.

By “authenticity” I mean having reasonable assurance that the person on my website is not just who they say they are, but that I can also get some idea about their intentions (or what they might have been). OpenID meets both of these criteria… if I want to know something more about the person registering or posting on my website, I can just go and check ’em out by visiting their URL.

But, in my experiments I found that the attribute-exchange process needs work… I could not get VeriSign's or Technorati's identity provider to release to my relying website the attributes I wanted, namely my identity's full name and e-mail addresses. I determined that this was because neither of these identity providers support what the OpenID people call the “Simple Registration” profile aka SREG.

More on this later. Needless to say, I am encouraged by my progress so far. And regardless of the outcome of my investigations into InfoCard and OpenID, my JSPWiki workflow library development continues at a torrid pace.

Bottom line: once we have a decent workflow system in place, I'll open registrations back up. And longer term, we will have more some open identity system choices.

Hmmm.  Interesting thoughts that I want to explore more over the next while.

Before I get to the nitty-gritty, please note that Cardspace and InfoCards do NOT require a client-side wiki or web site to use WS-* protocols

The system supports WS-*, which gives it the ability to handle upper-end scenarios, but doesn't require it and can operate in a RESTful mode! 

So the actual effort required to implement the client side is on the same order of magnitude as for OpenID.  But I agree there are not very many open-source options out there for doing this yet – requiring more creativity on the part of the implementor.  I'm trying to help with this.

It's also true that InfoCards require client software (although there are ways around this if someone is enterprising: you could build an infocard selector that “lives in the cloud”).

But the advantages of InfoCard speak clearly too.  Andy Jaquist would find that release of user information is built right in, and that “what you see is what you get” – user control.  Further, the model doesn't expose the user to the risk that personal information will become public by being posted on the web.  This makes it useful in a number of applications which OpenID can't handle without a lot of complexity.

But what's the core issue? 

InfoCards change the current model in which the user can be controlled by an evil site.  OpenID doesn't.

if a user ends up at an evil site today, it can pose as a good site known to the user by scooping the good site's skin so the user is fooled into entering her username and passord.

But think of what we unleash with OpenID…

It's way easier for the evil site to scoop the skin of a user's OpenID service because – are you ready? – the user helps out by entering her honeypot's URL!

By playing back her OpenID skin the evil site can trick the user into revealing her creds.  But these are magic creds,  the keys to her whole kingdom!  The result is a world more perilous than the one we live in now.

If that isn't enough, evil doers armed with identifiers and ill-gotten creds can then crawl the web to see where the URL they have absconded with is in play, and break into those locations too.

The attacks on OpenID all lend themselves to automation…

One can say all this doesn't matter because these are low-value identities, but I think it is a question of setting off on the wrong foot unless we build the evolution of OpenID into it.

It will really be a shame if all the interest in new identity technology leads to security breaches worse than those that currently exist, and brings about a further demoralization of the user.

I'd like to see OpenID and InfoCard technologies come together more.  I'll be presenting a plan for that over the next little while.


Back in action

My day job has conspired with the holidays to play havoc with my blog over the last while. 

What can I say?  Maybe something good will come out of it.  At least those of you who subscribe to my feed got a bit of peace and quiet!  And I feel rested and relatively renewed.  I missed writing.

At the same time, there were many exciting identity-related developments that came to my attention but which I wasn't able to pass on.  Sorry about that.  There was simply no way to “do everything simultaneously all at once”.

But on the positive side of the balance sheet, I was able to complete some work on how Cardspace actually behaves over the wire. 

I've put together a PHP implementation of the Identity Provider end of things which I hope will help better convey, in a cross-platform fashion, what is possible with the identity provider paradigm and how Cardspace actually uses the WS protocols.  I hope this, in conjunction with some important new documentation by Arun Nanda, will aid in the development of other compatible InfoCard implementations.

All that remains is to write about all this stuff.  So, here we go…


Creating test certificates

Once you have a Certificate Authority, you have a factory for producing certificates.  This will let you mint test certificates for your InfoCard relying party (they will also work should you want to experiment with being a managed card provider).

The gotcha is that before they will work on a machine, they have to be hand-installed.  Why?  They have not been issued by the widely distributed trust root authorities shipped with Window,  Macs, and Linux.  Thus they don't work “out of the box”.  That's why you need for the installation step.

The result is that while perfect for testing and experimentation, these certs won't work as production certs in the real world.   There you'll have to go to a commercial provider.  But this won't break the bank.  My identityblog cert costs quite a bit less $2.00 per month.

We'll deal with this issues in another part of this guide.  For now, let's turn to using your factory to create a test cert.

Create a Certificate Request for your machine

Change directory to the “openssl/democa” directory you made earlier.  Run “makereq” to generate a machine SSL key and corresponding certificate request. This time the system will ask for a passphrase to protect the SSL key for which the cert is being requested. In other words, this is a different key, cert and passphrase combination than you used with the Certificate Authority.

When running the script, enter a simple DNS name as the CN (hostname) field.  In my case, for example, I used www.identityblog.com as the CN. Don't use the http:// prefix or nothing works!

makereq screenshot

After running the script, the machine's private key will be written to democa/keys/privkey.pem. Meanwhile a certificate request will be placed in democa/requests/cert.csr.

Create your Certificate

Next, run “makecert” – which puts the certificate request from the last step into the Certificate Authority (i.e. factory) to produce a certificate. You'll be asked for the CA's passphrase:

makecert screenshot

When this is complete, the cert has been created, and is in “democa/certs/cert.crt”.

If you want to use the cert within IIS

If you want to use the cert in IIS, run “makep12” and get ready for a final conflagration of passprases. This script combines your private key and cert into a single “.p12” file that can be installed as a windows machine cert. To do so it performs a format translation. You will have to supply the machine key's passphrase to decode the “.pem” formatted file so the translation can proceed. Then you will be asked for an export passphrase (the one used to protect it in the new p12 format). I always use the same passphrase – who cares what format the information is in?

makep12 screenshot

“makep12” puts the combined Windows key/certificate file in “democa/keys/iiscert.p12”

Now your openssl machine key is in “democa/keys/privkey.pem”. Your machine cert is in “democa/certs/cert.crt”. Your IIS key/cert combination, if you made one, is in “democa/keys/iiscert.p12”.

Moving the files into the “keys” directory

To use my sample managed card code, create a “keys” directory under your http server's root directory. Move the privkey.pem you just created into “keys/host.key”. Move the cert you just created into “keys/host.crt”. Create a file called “keys/host.pwd” and put the machine key's passphrase into that file. Then the scripts I provide should work with your newly created keys and cert.

Follow instructions elsewhere in this guide if you want to install the combined p12 key into Windows and IIS.

What if you want more certificates?

You've got a certificate factory now, and can make as many certs as you like by going back to the “Create a certificate request” step and running through the process again.


Firefox support for Windows CardSpace

Via Mary Jo Foley's Unblinking Eye on Microsoft,  here's a piece on a new Firefox plugin supporting CardSpace on Window's Platforms:

A new plug-in providing Firefox support for Microsoft's CardSpace digital-identity framework is now available for public download.

Solution architect Kevin Miller, who played an instrumental role in developing the technology, announced the availability of his Firefox add-on for Windows via his blog.

Why is Firefox support important? Until there is more third-party support for Microsoft's CardSpace, it will be slow to gain traction. But until CardSpace gains more traction, developers will be reluctant to build applications that make use of it. CardSpace, the technology formerly known as InfoCard, is a key piece of Microsoft's proposed Internet-wide identity metasystem.

CardSpace is designed to store centrally an individual's multiple digital identities used to log into different secure sites (not quite – see below). Microsoft built support directly into Internet Explorer 7.0. And CardSpace is one of the elements of the .Net Framework 3.0, which Microsoft introduced alongside Windows Vista and has back-ported to Windows XP and Windows Server 2003.

Miller blogged: “You can download the (Mozilla CardSpace) extension here for now. I'll jump through the hoops over at addons.mozilla.org this week, and hopefully it will be available there soon. I'll post an update when it is there. I've also set up a project over at Codeplex (as mentioned briefly in my first post), and will get the code posted there in the next day or so.”

Scott Hanselman, chief architect with Corillian Corp., a Hillsboro, Ore.-based financial-services integrator, is bullish about CardSpace's prospects. “CardSpace is going to change it all. It’s likely the biggest thing to happen to security since HTTPS. CardSpace changes the game for consumers. It’ll take a few years, but after IE7 and FireFox and MacOSX all have CardSpace implementations – and it won’t take long – we’ll see Identity 2.0 happen,” Hanselman said.

“If you contrast (CardSpace) with the way certificate management has traditionally worked on nearly any OS, it’s significant because it makes secure certificates accessible to my mom. CardSpace and its related specifications make a secure identity experience accessible, both to the user and to the programmer.”

There are a number of other third-party companies and coalitions beyond Mozilla developing CardSpace-compatible providers and support.  Even Microsoft's own Windows Live team is looking to throw its backing behind the effort. The Windows Live ID team is developing a security token service (STS) that supports CardSpace, according to Richard Turner, senior product

(Live ID is the successor to Microsoft's Passport authentication system.)

“We need a proliferation of ID providers,” Turner said. “LiveID is just one of those providers.”

Mary Jo does an admirable job of describing what's at stake here, though I need to remind readers that CardSpace doesnt actually store digital identities centrally – it just stores metadata (pointers) to identity providers.  This may sound like nit-picking, but it's hugely important in mitigating risk. 

The main point is that Kevin has done some great work here.  I've used his plugin with Firefox and it works beautifully.  If you use Firefox on Windows, give it a try.

I'll try to start compiling a list of resources so people can easily see what to download given various configurations and predelictions.


Creating a Certificate Authority for Test Certificates

You can use any Certificate Authority (CA) to create test certificates.  This description is intended for people who don't have a CA.  It tells you how to create test certificates that can be used when developing CardSpace relying parties and managed card services.  Since CardSpace is part of a wider WS-Trust and InfoCard ecology, the same certificates will work with other software being developed within the cross-platform identity metasystem.

This recipe uses OpenSSL since it is available on virtually every platform and well suited to a test environment.  I'm assuming people with Microsoft Certificate Server already know how to produce certificates.  Later in this series I'll explain how to produce and install high assurance certs.

My goal is to get you past certificate issues with the least muss and fuss.  You should turn to other resources if you want an in-depth background on X509 or a description of how OpenSSL works.

Download OpenSSL and DemoCA

First, you need openssl binaries.  A number of linux distributions have them preinstalled.  If your OS doesn't, visit http://www.openssl.org/.  If possible find the binary distribution so you don't have to compile anything.  Distributions are posted here.  OpenSSL for Windows is available here.

Once you have your binaries installed, download DemoCA ZIP, which I have produced to accompany this tutorial.  Create a directory which is a sibling of the openssl/bin directory – for example. openssl/democa.  Extract the files from the zip into the directory.  If you are not on Windows you'll have to convert the batch files to scripts of some sort, but this will be totally trivial.

NOTE:  Click to enlarge the images below if you want to see what the scripts output to the screen.  But base yourself on the DemoCA scripts, not just what you see here.

Create a Certificate Authority 

The Certificate Authority is a factory for certificates.  You put a “certificate request” into the factory and out comes a certificate attested to by the factory.  So the first thing you need is the Certificate Authority, which has its own certificate and private key.  

From within the directory you just created, run “createca” and answer the prompts with suitable values (use the defaults I give as a guide).

Create CA screenshot Click screenshot
to enlarge it.


This places your CA certificate in democa/cacert.crt, and stores the corresponding private key in “democa/private/cakey.pem.  The private key is protected by the pass phrase you entered.  Remember this passphrase as your Certificate Authority passphrase.  You'll need it whenever you want to create a certificate.

Examining your CA certificate

You can make sure the certificate is correct by looking at it on a Windows box.  Double click on the cacert.crt file and you will see:

Click screenshot
to enlarge it.

You'll see the certificate isn't “trusted” yet.  No problem – it shouldn't be trusted, given that you haven't installed it yet (installation is the indication that you trust it).  We show installation elsewhere in this guide. 

Go to the “Details” pane and highlight “Subject”.  You will see the name of your Certificate Authority.

Click screenshot
to enlarge it.

Finally, highlight “Basic Constraints”.  You should see Subject Type=CA.  If you don't, something has gone wrong – and you don't have a CA cert. 

Click screenshot
to enlarge it.

Practical Guide To Certificate Installation for the Disinterested

It's a bit tricky to install certificates and keys, and harder still when you want to use the same certificate on both Windows and *NIX boxes.  Most of us don't have to install certificates very often (!), but that doesn't make it any easier! If you're like me you forget at least one of the annoying little essential details.

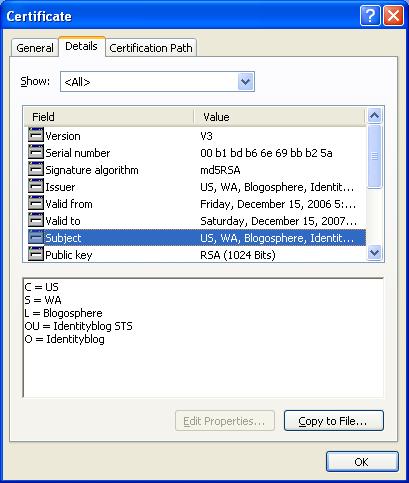
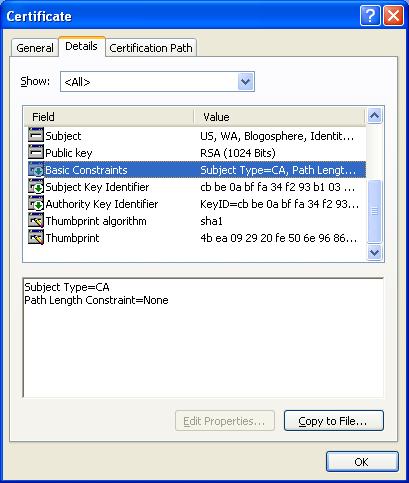
So partly in light of questions I've been receiving, and partly so next time I encounter these problems I remember how I answered them, I'm putting together what I hope might be a useful “Practical Guide to Certificate Installation for the Disinterested“.  In other words, I'm NOT discussing how to use certificates in production environments.

I'm kind of starting in the middle, but I've got three pieces ready so far.  If you're not familiar with this area, OpenSSL is an open source tool for managing certificates and IIS is Microsoft's Internet Information Server (i.e. Web server).  If you see problems with my instructions, please let me know.

Now for the pithy titles:

I'm also going to tackle the issue of creating InfoCard-compatible certs for testing and developing purposes.  If others want to add other sections let me know.


Configuring IIS to use the machine certificate

 Start up the IIS management console – for example by going to the Control Panel, opening “Administrative Tools”, and the opening “Internet Information Services”.

Double click on your local computer, then “Websites”, and highlight “Default Web Site”

Under the “Action” menu, select “Properties”, and then the “Directory Security” tab:

Click on the “Server Certificate” button and select “Next” when you see the wizard.  Then highlight the “Assign an existing certificate” radio button:

Click “Next”, highlight an appropriate certificate (e.g. the one you just installed), and press “Next” again.

You'll be shown certificate details, and on pressing “Next” one more time you'll be asked to “Finish”.

IIS is now configured to accept your machine certificate.


Converting OpenSSL PEM certificates and keys into a P12 format for IIS

Sometimes you want the same public key and certificate to operate on both *NIX and Windows machines. 

One way to do this is to create your key pair using openssl, obtain a certificate in PEM format, and then use openssl to convert the key and corresponding certificate into a P12 format that can be consumed by Windows.

PEM format is base64 encoded, meaning it is standard text that can be put into an ascii editor like Windows notepad.

Openssl needs you to give it a single file with a “.PEM” extension combining both your certificate and private key.  You do this by cutting and pasting the text from your certificate and private key files to produce a “.PEM” file like this:

Next, use openss to create a “p12” file using the combined “.PEM” file.  The command is shown below.  Assuming your private key is protected by a passphrase, you will first be asked for the passphrase to unlock your “.pem” key, and then asked for another to protect the newly created “p12” file.  (I use the same one to reduce prospects of insanity).

The result will be a “.p12” file that you can install into Windows.


Installing a machine certificate in the Windows certificate store

Our goal is to install a key and certificate that will act on behalf of your IIS server.  So the certificate must be stored in the “local machine” part of your certificate store (as opposed to that belonging to any one specific user)   Here's how do that:

  • Create a console by selecting “Start->Run” and entering “mmc” (or just type “start mmc” from a command prompt.
  • A console will be created, and under the File menu, select “Add/Remove Snap-in”.
  • Select Add, and the “Add Standalone Snap-in” screen appears
  • Select “Certificates” and press the related “Add” button

  • Select the “Computer account” radio button and press “Next”, then “Finish” with the next screen

  • Unwind the dialogs by pressing “Close” and “OK”
  • Open up “Personal” and the “Certificates” as shown here:

  • Then under the “Action” menu, select “All tasks” and then “Import…”
  • “Next” yourself past the first page of the wizard to get to the import menu.  You can just type the path, but if you browse, remember to change the “File Type” to “Personal Information Exchange” or you won't see anything.

  • Press “Next” and you will be asked for the file's passphrase.  Enter it, press “Next” and then accept the default Certificate store with another “Next”.

  • This takes you to the finish dialog, and you end up with a certificate that can be used by the IIS process.