Creating test certificates

Once you have a Certificate Authority, you have a factory for producing certificates.  This will let you mint test certificates for your InfoCard relying party (they will also work should you want to experiment with being a managed card provider).

The gotcha is that before they will work on a machine, they have to be hand-installed.  Why?  They have not been issued by the widely distributed trust root authorities shipped with Window,  Macs, and Linux.  Thus they don't work “out of the box”.  That's why you need for the installation step.

The result is that while perfect for testing and experimentation, these certs won't work as production certs in the real world.   There you'll have to go to a commercial provider.  But this won't break the bank.  My identityblog cert costs quite a bit less $2.00 per month.

We'll deal with this issues in another part of this guide.  For now, let's turn to using your factory to create a test cert.

Create a Certificate Request for your machine

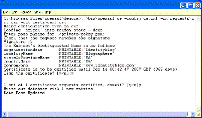
Change directory to the “openssl/democa” directory you made earlier.  Run “makereq” to generate a machine SSL key and corresponding certificate request. This time the system will ask for a passphrase to protect the SSL key for which the cert is being requested. In other words, this is a different key, cert and passphrase combination than you used with the Certificate Authority.

When running the script, enter a simple DNS name as the CN (hostname) field.  In my case, for example, I used www.identityblog.com as the CN. Don't use the http:// prefix or nothing works!

makereq screenshot

After running the script, the machine's private key will be written to democa/keys/privkey.pem. Meanwhile a certificate request will be placed in democa/requests/cert.csr.

Create your Certificate

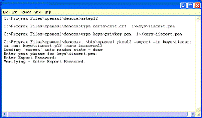
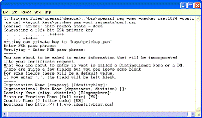
Next, run “makecert” – which puts the certificate request from the last step into the Certificate Authority (i.e. factory) to produce a certificate. You'll be asked for the CA's passphrase:

makecert screenshot

When this is complete, the cert has been created, and is in “democa/certs/cert.crt”.

If you want to use the cert within IIS

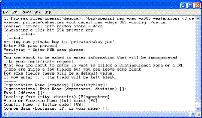
If you want to use the cert in IIS, run “makep12” and get ready for a final conflagration of passprases. This script combines your private key and cert into a single “.p12” file that can be installed as a windows machine cert. To do so it performs a format translation. You will have to supply the machine key's passphrase to decode the “.pem” formatted file so the translation can proceed. Then you will be asked for an export passphrase (the one used to protect it in the new p12 format). I always use the same passphrase – who cares what format the information is in?

makep12 screenshot

“makep12” puts the combined Windows key/certificate file in “democa/keys/iiscert.p12”

Now your openssl machine key is in “democa/keys/privkey.pem”. Your machine cert is in “democa/certs/cert.crt”. Your IIS key/cert combination, if you made one, is in “democa/keys/iiscert.p12”.

Moving the files into the “keys” directory

To use my sample managed card code, create a “keys” directory under your http server's root directory. Move the privkey.pem you just created into “keys/host.key”. Move the cert you just created into “keys/host.crt”. Create a file called “keys/host.pwd” and put the machine key's passphrase into that file. Then the scripts I provide should work with your newly created keys and cert.

Follow instructions elsewhere in this guide if you want to install the combined p12 key into Windows and IIS.

What if you want more certificates?

You've got a certificate factory now, and can make as many certs as you like by going back to the “Create a certificate request” step and running through the process again.
 

Firefox support for Windows CardSpace

Via Mary Jo Foley's Unblinking Eye on Microsoft,  here's a piece on a new Firefox plugin supporting CardSpace on Window's Platforms:

A new plug-in providing Firefox support for Microsoft's CardSpace digital-identity framework is now available for public download.

Solution architect Kevin Miller, who played an instrumental role in developing the technology, announced the availability of his Firefox add-on for Windows via his blog.

Why is Firefox support important? Until there is more third-party support for Microsoft's CardSpace, it will be slow to gain traction. But until CardSpace gains more traction, developers will be reluctant to build applications that make use of it. CardSpace, the technology formerly known as InfoCard, is a key piece of Microsoft's proposed Internet-wide identity metasystem.

CardSpace is designed to store centrally an individual's multiple digital identities used to log into different secure sites (not quite – see below). Microsoft built support directly into Internet Explorer 7.0. And CardSpace is one of the elements of the .Net Framework 3.0, which Microsoft introduced alongside Windows Vista and has back-ported to Windows XP and Windows Server 2003.

Miller blogged: “You can download the (Mozilla CardSpace) extension here for now. I'll jump through the hoops over at addons.mozilla.org this week, and hopefully it will be available there soon. I'll post an update when it is there. I've also set up a project over at Codeplex (as mentioned briefly in my first post), and will get the code posted there in the next day or so.”

Scott Hanselman, chief architect with Corillian Corp., a Hillsboro, Ore.-based financial-services integrator, is bullish about CardSpace's prospects. “CardSpace is going to change it all. It’s likely the biggest thing to happen to security since HTTPS. CardSpace changes the game for consumers. It’ll take a few years, but after IE7 and FireFox and MacOSX all have CardSpace implementations – and it won’t take long – we’ll see Identity 2.0 happen,” Hanselman said.

“If you contrast (CardSpace) with the way certificate management has traditionally worked on nearly any OS, it’s significant because it makes secure certificates accessible to my mom. CardSpace and its related specifications make a secure identity experience accessible, both to the user and to the programmer.”

There are a number of other third-party companies and coalitions beyond Mozilla developing CardSpace-compatible providers and support.  Even Microsoft's own Windows Live team is looking to throw its backing behind the effort. The Windows Live ID team is developing a security token service (STS) that supports CardSpace, according to Richard Turner, senior product

(Live ID is the successor to Microsoft's Passport authentication system.)

“We need a proliferation of ID providers,” Turner said. “LiveID is just one of those providers.”

Mary Jo does an admirable job of describing what's at stake here, though I need to remind readers that CardSpace doesnt actually store digital identities centrally – it just stores metadata (pointers) to identity providers.  This may sound like nit-picking, but it's hugely important in mitigating risk. 

The main point is that Kevin has done some great work here.  I've used his plugin with Firefox and it works beautifully.  If you use Firefox on Windows, give it a try.

I'll try to start compiling a list of resources so people can easily see what to download given various configurations and predelictions.


Creating a Certificate Authority for Test Certificates

You can use any Certificate Authority (CA) to create test certificates.  This description is intended for people who don't have a CA.  It tells you how to create test certificates that can be used when developing CardSpace relying parties and managed card services.  Since CardSpace is part of a wider WS-Trust and InfoCard ecology, the same certificates will work with other software being developed within the cross-platform identity metasystem.

This recipe uses OpenSSL since it is available on virtually every platform and well suited to a test environment.  I'm assuming people with Microsoft Certificate Server already know how to produce certificates.  Later in this series I'll explain how to produce and install high assurance certs.

My goal is to get you past certificate issues with the least muss and fuss.  You should turn to other resources if you want an in-depth background on X509 or a description of how OpenSSL works.

Download OpenSSL and DemoCA

First, you need openssl binaries.  A number of linux distributions have them preinstalled.  If your OS doesn't, visit http://www.openssl.org/.  If possible find the binary distribution so you don't have to compile anything.  Distributions are posted here.  OpenSSL for Windows is available here.

Once you have your binaries installed, download DemoCA ZIP, which I have produced to accompany this tutorial.  Create a directory which is a sibling of the openssl/bin directory – for example. openssl/democa.  Extract the files from the zip into the directory.  If you are not on Windows you'll have to convert the batch files to scripts of some sort, but this will be totally trivial.

NOTE:  Click to enlarge the images below if you want to see what the scripts output to the screen.  But base yourself on the DemoCA scripts, not just what you see here.

Create a Certificate Authority 

The Certificate Authority is a factory for certificates.  You put a “certificate request” into the factory and out comes a certificate attested to by the factory.  So the first thing you need is the Certificate Authority, which has its own certificate and private key.  

From within the directory you just created, run “createca” and answer the prompts with suitable values (use the defaults I give as a guide).

Create CA screenshot Click screenshot
to enlarge it.


This places your CA certificate in democa/cacert.crt, and stores the corresponding private key in “democa/private/cakey.pem.  The private key is protected by the pass phrase you entered.  Remember this passphrase as your Certificate Authority passphrase.  You'll need it whenever you want to create a certificate.

Examining your CA certificate

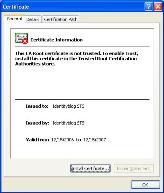
You can make sure the certificate is correct by looking at it on a Windows box.  Double click on the cacert.crt file and you will see:

Click screenshot
to enlarge it.

You'll see the certificate isn't “trusted” yet.  No problem – it shouldn't be trusted, given that you haven't installed it yet (installation is the indication that you trust it).  We show installation elsewhere in this guide. 

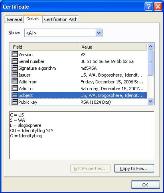
Go to the “Details” pane and highlight “Subject”.  You will see the name of your Certificate Authority.

Click screenshot
to enlarge it.

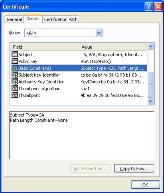
Finally, highlight “Basic Constraints”.  You should see Subject Type=CA.  If you don't, something has gone wrong – and you don't have a CA cert. 

Click screenshot
to enlarge it.