
You can use any Certificate Authority (CA) to create test certificates. This description is intended for people who don't have a CA. It tells you how to create test certificates that can be used when developing CardSpace relying parties and managed card services. Since CardSpace is part of a wider WS-Trust and InfoCard ecology, the same certificates will work with other software being developed within the cross-platform identity metasystem.
This recipe uses OpenSSL since it is available on virtually every platform and well suited to a test environment. I'm assuming people with Microsoft Certificate Server already know how to produce certificates. Later in this series I'll explain how to produce and install high assurance certs.
My goal is to get you past certificate issues with the least muss and fuss. You should turn to other resources if you want an in-depth background on X509 or a description of how OpenSSL works.
Download OpenSSL and DemoCA
First, you need openssl binaries. A number of linux distributions have them preinstalled. If your OS doesn't, visit http://www.openssl.org/. If possible find the binary distribution so you don't have to compile anything. Distributions are posted here. OpenSSL for Windows is available here.
Once you have your binaries installed, download DemoCA ZIP, which I have produced to accompany this tutorial. Create a directory which is a sibling of the openssl/bin directory – for example. openssl/democa. Extract the files from the zip into the directory. If you are not on Windows you'll have to convert the batch files to scripts of some sort, but this will be totally trivial.
NOTE: Click to enlarge the images below if you want to see what the scripts output to the screen. But base yourself on the DemoCA scripts, not just what you see here.
Create a Certificate Authority
The Certificate Authority is a factory for certificates. You put a “certificate request” into the factory and out comes a certificate attested to by the factory. So the first thing you need is the Certificate Authority, which has its own certificate and private key.
From within the directory you just created, run “createca” and answer the prompts with suitable values (use the defaults I give as a guide).
 |
Click screenshot to enlarge it. |
This places your CA certificate in democa/cacert.crt, and stores the corresponding private key in “democa/private/cakey.pem. The private key is protected by the pass phrase you entered. Remember this passphrase as your Certificate Authority passphrase. You'll need it whenever you want to create a certificate.
Examining your CA certificate
You can make sure the certificate is correct by looking at it on a Windows box. Double click on the cacert.crt file and you will see:
 |
Click screenshot to enlarge it. |
You'll see the certificate isn't “trusted” yet. No problem – it shouldn't be trusted, given that you haven't installed it yet (installation is the indication that you trust it). We show installation elsewhere in this guide.
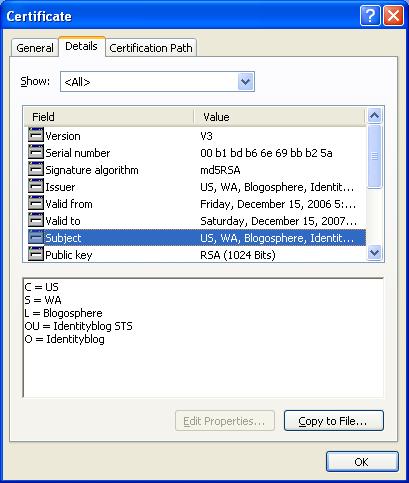
Go to the “Details” pane and highlight “Subject”. You will see the name of your Certificate Authority.
 |
Click screenshot to enlarge it. |
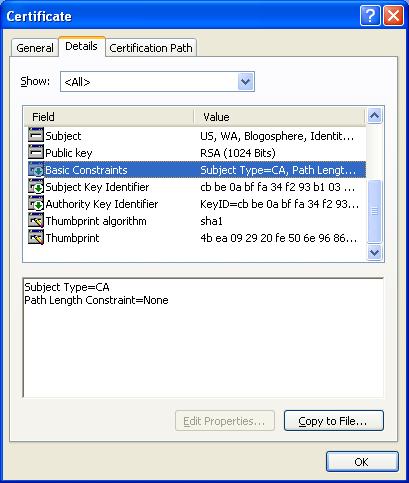
Finally, highlight “Basic Constraints”. You should see Subject Type=CA. If you don't, something has gone wrong – and you don't have a CA cert.
 |
Click screenshot to enlarge it. |